Plone Generic Setup First Contact
Short introduction to Generic Setup
Generic setup is one way for Zope and Plone to separate Contents and Customization of a site. The setup and customization of a site can be exported and downloaded in XML. These XML files can be compared to each other to extract the differences. And if you want to you can take the differences and apply to another site to make it appear more like the first one.
Generic setup is complex, large and does not come with any tool that is user friendly. In order for us to use it in this (probably minimal) tutorial we will need to:
- Export settings through the Zope Management Interface
- Take snapshots of settings in the Zope Management Interface
- Compare snapshots in the Zope Management Interface
- Rewrite and trim lots and lots of xml-files (perhaps Gnu Emacs or perhaps some other evil editor)
- Create a dummy Python package.
- Incorporate some boiler plate code (this is where we wave the dead chicken).
An excellent step by step tutorial in plone.org by Daniel Nouri and Wim Boucquaert can be found here [1]. Another larger tutorial with perhaps a little much at a time by Rob Miller can be found here: [2].
This tutorial will assume you have at least basic knowledge of the Zope Management Interface - if you do not have it you will get it! [:)]-|--<
You can download the product we create in this tutorial here: [3]
Goal of this tutorial
We will learn the basics of Generic Setup by applying a profile to a site that removes some of the viewlets from it (see Plone Viewlets First Contact). We will then turn this into a Plone product so that it can be installed - but also making it a profile so that in can be invoked when creating a plone site.
I will do this by manipulating mainly blank plone sites - please do not have a lot of contents on your site when you follow this tutorial - some changes are a pain in the neck to uninstall (meaning you will have to do it manually).
Step One: Creating Snapshots
A snapshot is a file in zope containing all your settings. The snapshots are central when you want to create products using generic setup since they help you create the xml-files you need without too many xml-situps.
To create a snapshot:
- Go to the zope management interface of your site (probably something like localhost:8080/Plone/manage)
- Follow the link to portal_setup.
- Select the tab called Snapshots.
You should now see something like this:
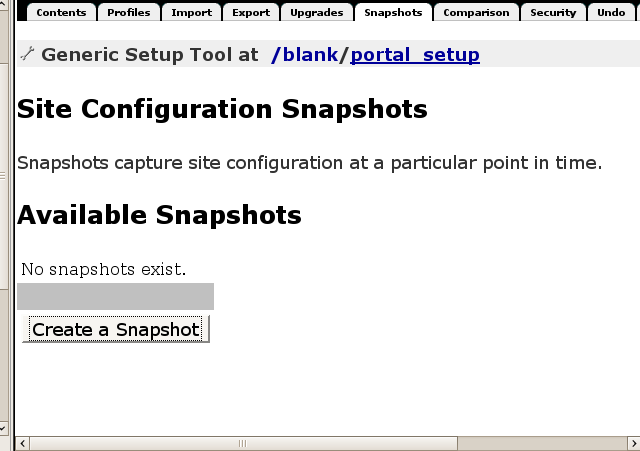
Beware: in my version of Zope (2.10.4 - the version that ships with Plone 3.0.2) there is a bug on this page. When you click the button "Create a snapshot" the page just loads and loads forever - just wait ten seconds and click on the tab Snapshots again to see the snapshot. Click the button and you have made your first snapshot. It is not really useful yet but we shall soon use it.
Step Two: Modify the page
You can now modify the page so that your modifications can later be used by others (or often: yourself when something is screwed up).
I want to change the viewlets, so I use the secret url-trick to find a user interface to find them: I point my browser to localhost:8080/Plone/manage-viewlets and I see something like in the screenshot below (it's not really secret - there is just no link to it that I am aware of).
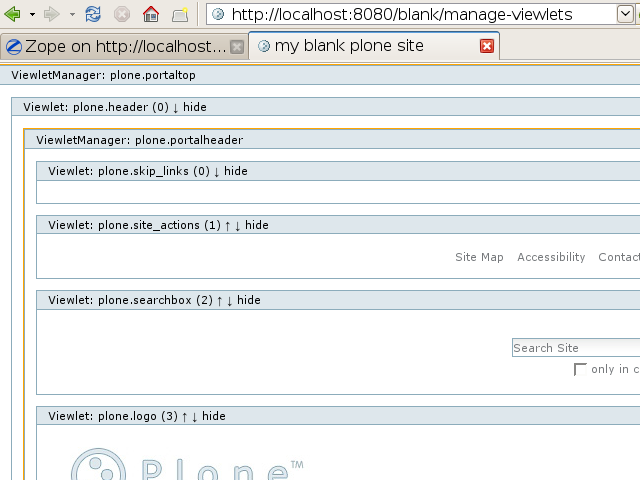
We do some changes we find interesting and then move along to making another snapshot. See the previous step if you forgot how to make a snapshot.
Step Three: Compare snapshots
Once we have at least two snapshots we can compare them. Go to ZMI -> portal_setup -> snapshots and select the tab Comparison. Before you click Compare you should see something like in the next screenshot. After you click compare you will see a huge list of different files that have been changed - why so much is modified that should not be modified is a mystery, you just have to be aware of it and learn to ignore it.
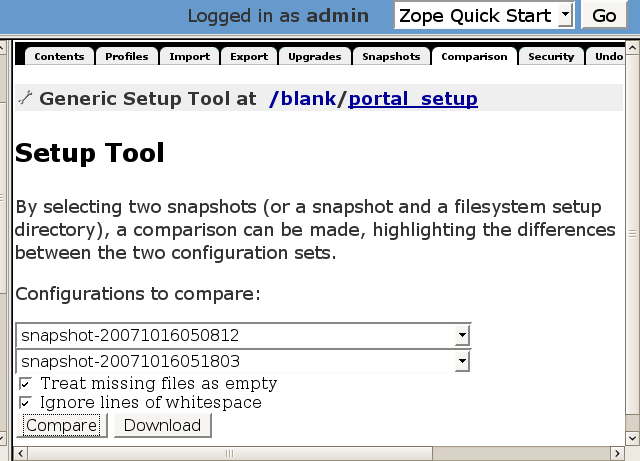
The interesting changes should be noted and remembered since this is what this tutorial is all about. In my case I had some changes in the viewlets.xml-file.
Step Four: Exporting wanted settings
Once you have noted the changes that are of importance you are ready to export them. Go to the tab export in the same interface. (If the link is broken and you are taken somewhere strange just click portal_setup in the left frame and then try export again). You should see something like this once it is right:
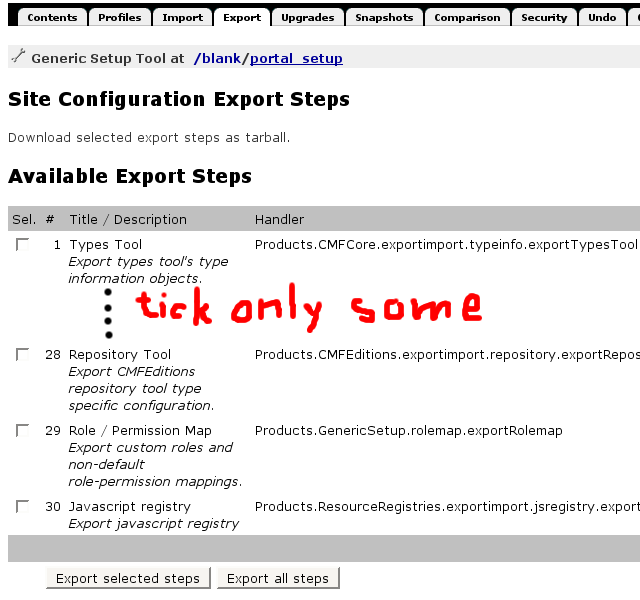
You are now offered a number of Site Configuration Export steps, and we should only select the interesting ones - in our case the one that deals with viewlets. (In my product that you can download below I also made another important change - I leave as an exercise for the reader to figure out which one). Select the ones you want and click Export selected steps.
You will be offered to download a file called snapshot***.tar.gz, uncompress it and extract the contents in a new folder - it should pretty contain the file called viewlets.xml.
The interesting and important work of modifying this file now comes. As you could see in the diff in the previous step only some lines have changed - these are the lines that should be contained in this file. The reason is that we are only creating an extension profile (that extends the base profile). So the original setting is assumed to be known and we provide what is different. In our case the file should look something like this:
<?xml version="1.0"?>
<object>
 <hidden manager="plone.belowcontentbody" skinname="Plone Default">
  <viewlet name="plone.abovecontenttitle.documentactions"/>
 </hidden>
 <hidden manager="plone.portalfooter" skinname="Plone Default">
  <viewlet name="plone.analytics"/>
  <viewlet name="plone.colophon"/>
  <viewlet name="plone.footer"/>
 </hidden>
 <hidden manager="plone.portalheader" skinname="Plone Default">
  <viewlet name="plone.skip_links"/>
  <viewlet name="plone.site_actions"/>
  <viewlet name="plone.searchbox"/>
 </hidden>
 <hidden manager="plone.portaltop" skinname="Plone Default">
  <viewlet name="plone.app.i18n.locales.languageselector"/>
  <viewlet name="plone.path_bar"/>
 </hidden>
 <hidden manager="plone.belowcontenttitle" skinname="Plone Default">
  <viewlet name="plone.belowcontenttitle.documentbyline"/>
 </hidden>
</object>
As you can see the word hidden is used over and over again - can you guess what it does?
Step five: Creating a generic setup profile
We now need to make this into a Python package and a Plone product. This will also make it felt by Zope.
What files are needed?
Except for the xml-files that are needed for the modification we only need three more files: a blank __init__.py, a short configure.zcml, and boilerplate Extensions/Install.py-file. All together I use these five files (and now you should easily be able to figure out what setting I touch apart from the viewlets):
__init__.py
configure.zcml
Extensions/Install.py
profiles/default/kssregistry.xml
profiles/default/viewlets.xml
Contents of the three non-xml files
__init__.py
The init-file only contains a comment to make this folder into a python package.
configure.zcml
The zcml-file I use registers a profile with the tag gs:registerProfile. I also import a namespace I am not sure I need (the browser namespace). You might want to import it since you will most likely need it if you do any extra work based on this tutorial.
<configure
  xmlns="[4];
  xmlns:browser="[5];
  xmlns:gs="[6];>

  <gs:registerProfile
    name="default"
    title="ViewletModification profile"
    directory="profiles/default"
    description=""
    provides="Products.GenericSetup.interfaces.EXTENSION"
    for="Products.CMFPlone.interfaces.IPloneSiteRoot"
    />

</configure>
Extensions/Install.py
The install-file is executed whenever this product is installed via the quickinstaller - and the only thing you might want to modify is the line where it says "profile-Products.ViewletModification:default" since ViewletModification is the name of the product you might need to change it if you rename your product.
from Products.CMFCore.utils import getToolByName

def install(portal):
    setup_tool = getToolByName(portal, 'portal_setup')
    old_context = setup_tool.getImportContextID()
    setup_tool.setImportContext('profile-Products.ViewletModification:default')
    setup_tool.runAllImportSteps()
    setup_tool.setImportContext(old_context)
    return "Ran all import steps."
Step six: creating a new site with our profile
If you now restart zope and put this product in the Products folder of your instance you should be able to create a site with this profile. It should look something like this (note the Extension profile selected at the bottom of the screenshot):
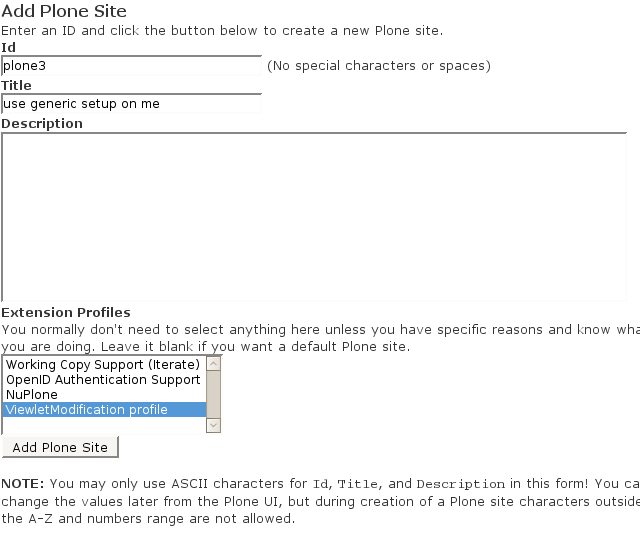
You should also be able to install this product through the regular Plone -> Site Setup -> Add-on Products interface.
Please note
- If you install it via ZMI installing it again will have no effect since it is already installed.
- If you install this product you can not uninstall it. Changes are permanent.
Step seven: viewing the differences of a regular site and our new site
This is just a simple screenshot I made to illustrate the changes this generic setup profile enforces on a Plone site. Your profile might enforce other changes of course.

Download
Download the product we create in this tutorial here: [7]
See also Plone Cms.
This page belongs in Kategori Programmering.